Demo: Feature experimentation
This hands-on tutorial for developers demonstrates how feature experimentation works on the Kameleoon platform. You'll start with a sample app and follow step-by-step instructions to configure a set of feature flags in the Kameleoon app, enable them in the sample app, and see how the feature flags affect the visitor's page.
The sample is written in TypeScript, but you don't need to know TypeScript to complete this tutorial. Experience with any modern programming language should be enough to understand the important points.
Prerequisites
Before you get started, you need to create a couple accounts:
- Sign up for a free 30-day Kameleoon trial account. You'll need to complete this tutorial within 30 days after requesting the account, but the tutorial should only take about 30 minutes to complete.
- A GitHub account.
Run the sample app
First, you'll get the app running in GitHub Pages, so you don't need to worry about setting up a web server. You'll need to be logged into your GitHub account.
- In the Bouncing ball repo in GitHub, click Fork. Follow the prompts to create your own fork of the sample app in
github.com/<your_username>/bouncing-ball. (Replace <your_username> throughout this tutorial with your GitHub account name.) - In your new
https://github.com/<your_username>/bouncing-ballrepo in GitHub, click the Actions tab and click the button to enable workflows. - In the Settings tab, click Pages, click the Source dropdown, and click GitHub Actions.
- In the Actions tab, click Deploy static content to Pages > Run workflow > Run workflow.
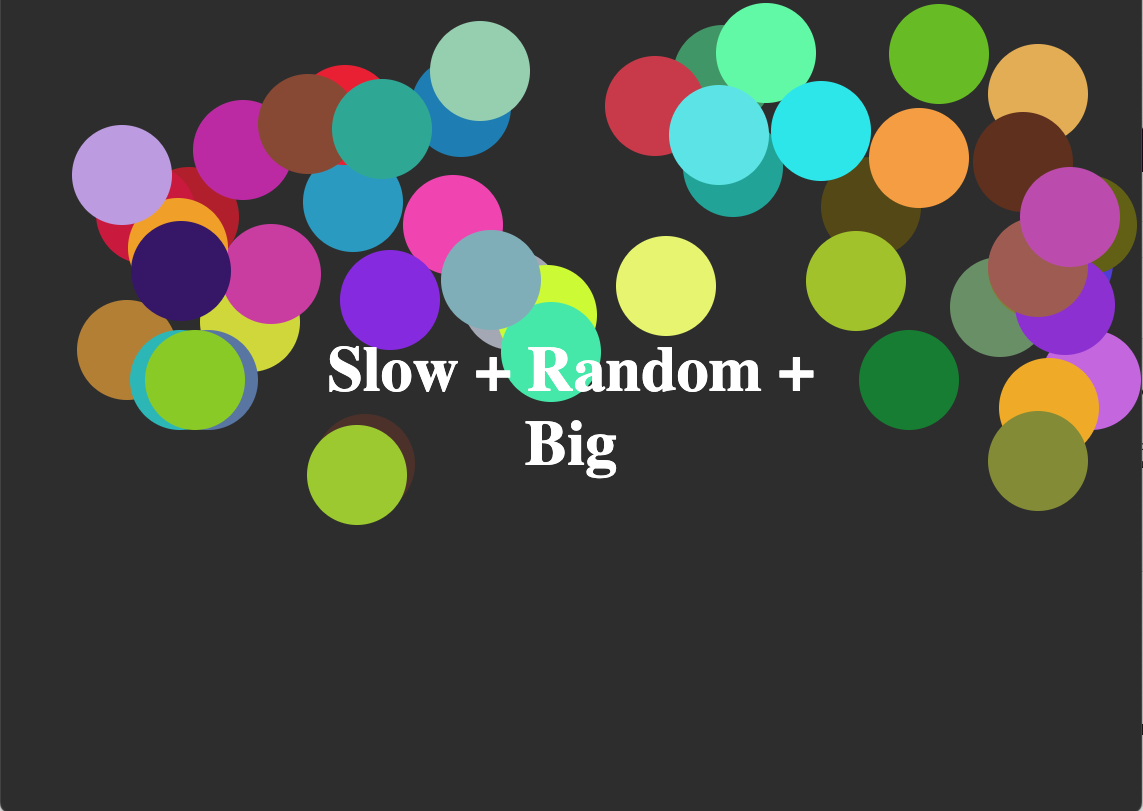
Once the build and deploy process completes (this might take a minute or two), you should be able to see the demo app running in a browser at https://<your_username>.github.io/bouncing-ball! It should look something like this:
Update the code sample
To make it faster to make changes to our project, you can programmatically adjust the update interval at which the SDK checks for configuration changes in your Kameleoon account:
- In your GitHub repo, in the Code tab, open the
src/main.tsfile. - Click the Edit this file button (with the pencil icon).
- Find and edit the
/src/main.tsfile. Find the following line:Replace the line with the following code:const client = new KameleoonClient({ siteCode });The new code adds a configuration with anconst configuration = {
updateInterval: 1,
};
const client = new KameleoonClient({ siteCode, configuration });updateIntervalof 1. This reduces the interval that the SDK polls for changes in the configuration down to once every minute (from the default once every 60 minutes). This is not recommended for a production environment due to the performance impact, but it's helpful for this tutorial because you won't have to wait an hour after making a configuration change to see its effects. Kameleoon also offers a premium streaming option that pushes your configuration changes to the SDK immediately. - Click Commit changes....
Set up a Kameleoon project
You'll need your Kameleoon trial account credentials before you start this section.
- Sign in to the Kameleoon app using your trial account credentials.
- In the left menu, expand Admin and click Projects > New project.
- In the dialog, click Site: Feature flags in the first dropdown, and paste
https://<your_username>.github.io/bouncing-ballas the URL of site. Remember to replace<your_username>with your GitHub account name. Click Add. - Copy the site code that's shown on the next page.
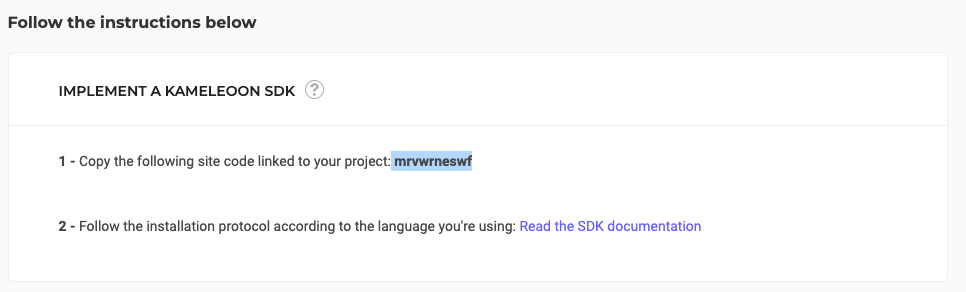
- In your GitHub repo, in the Code tab, edit the
src/constantsfile. Replace thesiteCodevalue with the site code you just copied and click Commit changes.
If you check your app in the browser again (https://<your_username>.github.io/bouncing-ball), you should see that all the bouncing circles have disappeared. That's because the circles were added by a Kameleoon feature flag in a different project. You just changed the site code so the site is now controlled by your Kameleoon project, which you haven't fully configured yet. Don't worry, you'll add your own circles back to the app with your own feature flags.
Troubleshooting: If you still see the Slow + Random + Big text and bouncing circles, try opening the page in an Incognito (or Privacy mode) window.
Set up feature flags
Feature flags let you roll out new features to a limited audience and test the effectiveness of the feature, before rolling it out to all of your users. As the developer, you may configure the feature flags yourself, or someone else in your organization might configure them for you. In either case, it's helpful to understand how feature flags are configured in the Kameleoon interface so you understand how to use the variables in your app.
- In the Kameleoon app, in the Activate menu, click Feature flags.
- Click New feature flag.
- Complete the fields with the following values:
- Name:
Bouncing ball demo - Project: {Select your project from the dropdown}
- Flag type: Permanent
- Feature key:
bouncing_ball_demoYou can leave the tags and description field empty.
- Name:
- Click Validate.
Set up variables
Variables are strings, numbers, boolean, or JSON values that you use in your app code to modify the app's behavior. Their values change depending on which variation Kameleoon assigns the visitor to.
Let's say you want to keep users on your site longer, so you want to add some bouncing circles to keep users engaged. However, you're not sure whether visitors will stay on the site longer if they are served a jolt of adrenaline (by our "Party time" variation) or slowly lulled into a trance (by our "Hypnotize" variation). So you'll set up a variation for each option and run an experiment.
On the new page that appears, expand the Set Up menu and click Variables.
Use the + Add Variable button to add 6 variables with the following values:
Variable key Type Default value title_text String Default variation: 1 green ball randomize_on_bounce Boolean False balls_amount Number 1 ball_speed Number 10 ball_color String green ball_size Number 20 cautionWatch for typos! The variable key names and types must match exactly. If you look at the
src/main.tsfile in your GitHub repo, you'll see why. The code sample uses these exact variable key names to retrieve the values of the variables, depending on the variation that Kameleoon assigns the visitor to.Click Save.
You've now set up a set of variables with default values. The default values are the values your app uses when there are no active campaigns for the visitor. If you turned on your feature flags now, you would see the default variation, with 1 green ball bouncing around slowly. This is because we haven't set up any variations yet.
Set up variations
Variations define the possible combinations of variables that control what a visitor sees in your app. Kameleoon assigns each visitor a variation on their first visit to the app.
- In Set Up, click Variations.
- Use the + Add variation button to add two new variations:
- Name:
Party time- ball_size:
50 - ball_color:
random - ball_speed:
75 - balls_amount:
75 - randomize_on_bounce:
True - title_text:
Hey! Get up and dance!
- ball_size:
- Name:
Hypnotize- ball_size:
200 - ball_color:
blue - ball_speed:
2 - balls_amount:
10 - randomize_on_bounce:
False - title_text:
You're getting very, very sleepy
- ball_size:
- Name:
Set up a goal
Next, you'll set up a goal. Goals define how you want to measure the effectiveness of your variations.
There are a number of different types of customizable goal types you can use, but we'll stick with a basic "time spent" metric.
- In the Set Up menu, click Goals > + Add goal.
- In the Configure goals section, click + Create a new goal and complete the following fields:
- Name: Time spent
- Type: Time Spent
- Project: {Select your project}
- Click Next and set the goal to: The visitor spent more than 30 seconds.
- Click Validate.
Roll out an experiment
Now that your variations are configured, you can start an experiment that displays the two variations to a subset of your audience. Once again, Kameleoon offers a lot of options and features (such as automated rollbacks, audience segments, rollout environments and progressive delivery rules) that this tutorial won't cover. For now, you'll just set up a basic feature experiment that displays one variation to 40% of your users and the other variation to a separate 40% of users. The remaining 20% will be served the default app.
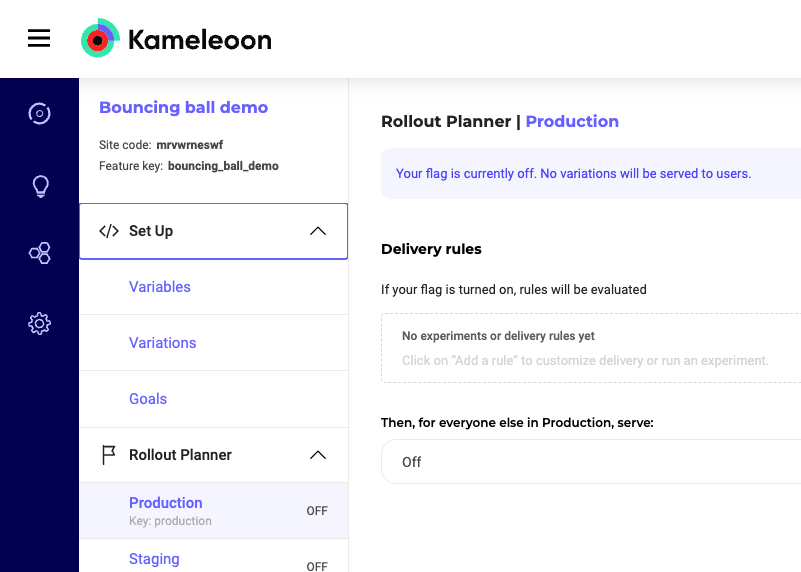
- In the Rollout Planner section, click Production.
- Click + Add a rule > Experiment.
- Reduce the Exposure slider to 80%.
- Under Variations to serve, click Party time and change the Exposition value to 40.00%.
- Click + Add a variation. The variation Hypnotize should be selected automatically (if not, select it). Change the Exposition value to 40.00%.
- Turn the ON/OFF toggle to ON.
- Click Save.
Test the app
Open the app in a browser. You should see one of the three possible variations: the Party time variation, the Hypnotize variation, or the Default variation.
 Party time variation
 Hypnotize variation
 Default variation
Now, try to simulate a new user until you see the other variations. This may take a few attempts as you may get assigned to the same variation multiple times. Because your browser saves a visitorCode, which is a unique ID that identifies you, you can't just refresh the page because you'll always see the variation that you were first assigned to. Instead, you need to look like a new visitor. Here are the simplest ways to do that:
- Switch to a different browser or device.
- Open the app in a new private window each time (depending on the browser, this may be called "Incognito", "Private Browsing", or something similar).
After enough attempts, you should be able to see all of the different variations. If so, congratulations! You've successfully set up a feature experiment with Kameleoon! 🎉🎉🎉
Next steps
- In the Reporting section of your experiment, look through some of the initial results, available integrations, and activity log. You won't have access to a lot of results data yet, due to low traffic.
- Look through the sample code to understand how the variables are applied in the code. If you're comfortable writing TypeScript, try adding your own variable.
- Look through the rest of this developer documentation and the Experimentation User Guide to learn more about all of the available options and features.
- Install the SDK of your choice and start building your own feature flags, personalizations, and other experiments.